Showing posts with label review. Show all posts

Tuesday, 17 May 2016

BornPrettyStore vinyls !

Hello ladies!

I've been missing from my blog for a long time...but I am back with a new post today.

A tiny review for you : Vinyls from BornPrettyStore.

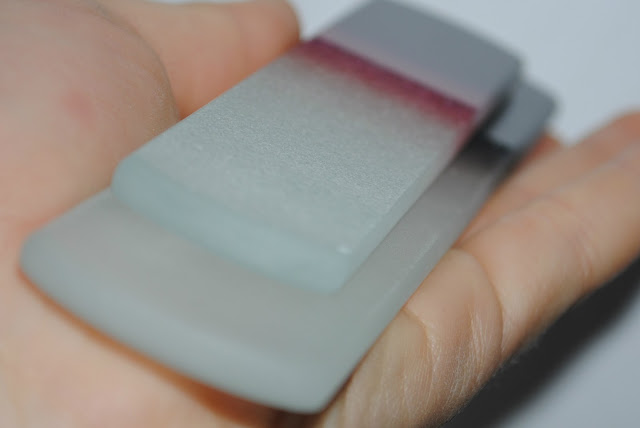
I've seen these kind of vinyls a long time ago on a lot of blogs and I've always wanted to try them out. I finally got the chance to.

They have a big variety of designs to chose from, here, that's why I had a hard time choosing one.

In the end I got one with some interesting patterns.

Today I am going to show you a manicure I did using the one on the right - I don't even know how to describe the design, but one thing is for sure : I love the way it looks.


This was the first time I used these type of nail stickers, and I found them very easy to use.

After I had my black base completely dry, I took one sticker and put it over my nails in the desired position. (tip: before sticking it to your nail, stick it somewhere on your hand - this way, you make sure the vinyl won't pick up your nail polish, due to a very strong adhesive)                                                                                                              
After I got the sticker in the position I wanted, I got a sponge and the nail polish. ( I used a textured nail polish, because, from what I've seen and known, they work best with this kind of polish)

I used the sponge and dabbed the nail polish over the sticker- after I finished, I quickly removed the vinyl, before the nail polish was dry.

The nail polish I used for the design was Showgirl Chic from Sally Hansen's Gen Crush collection.

For some more "glam" I added some studs to my ring finger.

In my opinion these vinyls are a very easy way to taking a dull manicure to the next level.


You can find the vinyls I used HERE, at the special price of 2.30$. You can also use my BornPrettyStore 10% discount code.


Monday, 14 March 2016

Why not...glitter?

Hello lovelies !


Hope you are having a good week start - I had a busy day but I really had to show you something <3 nbsp="" p="">
Recently I bought some nail polish from a blog sale ...and along side others ...I got a beautiful blue glitter from Orly, called ANGEL EYES. (after I saw how it looked on the nails I understood why they named it that way)

I am not that much into regular glitter...but this one had something special.

Hope you like it , because I fell in love with it :D

2 coats of Orly Angel eyes  - over this gorgeous blue from Golden Rose. 
 2 coats were enough for a perfect coverage and perfect shimmer.

The drying time is normal- not fast nor slow either.

I've had the nail polish on for 3 days now and it still looks perfect- no top coat added (the shimmer in the pics is all the polish, no top coat) and also, I've had a full dish washing and household work 3 days. So this manicure wasn't 'protected'.
I have to say I am pretty pleased with the way this is looking after 3 days - no chipping either! (yay)


Golden Rose WOW nr. 85 

Wednesday, 17 February 2016

The -clear jelly stamper- hype !!

Hello Hello !!


OMG -  I was so excited when I saw on...literally every social media  this stamper ...that I couldn't resist and I had to get it too.

Finally...after some waiting it arrived and of course I couldn't wait to try it , so here it is. I got the stamper from BornPrettyStore ( it's on sale for only 2.99) and together with it a stamping nail polish .

I don't even know where to start - I have so many things to say and show :D


This is how the stamper looks like - I got the all white version, and not the coloured one : pink or blue (yay) and the scraper too.

About the scraper ...I think they did a good job with this one - being all plastic (the older ones had a metal tip) works a lot better, it spreads the polish better on the stamping plate. Maybe other people did a fine job with the other one but I didn't - I hated the sound it made while scraping too.


JELLY JELLY JELLY JELLY

Yes, jelly stamper - it has a very soft consistence and it's very soft and squishy, I absolutely LOVE it.

This is the kind of stamper I would play with all day - just having it in my hands and pushing it. ( I don't sound crazy, don't I? ) - just like an anti stress ball.

I reviewed another interesting stamper HERE, and in comparison to that one the clear jelly one is a bit harder (the difference is not very big) and also bigger. I love the fact that it has a 2.8 diameter because you can easily pick up bigger design and cover up bigger nail beds or longer nails.
And another advantage compared to the other one is that this stamper stands - the other end is flat (and open too - i will show you later) and you can easily put it on the table without any fears that it will ruin the design.
This is how the stamper looks with a design on it.

I did nothing to prepare the head - it simply picked up the image right away - no filling and no wiping with nail polish remover (!!!) - I read some reviews where the girls had problems with picking up images and I was very curious to see if I encounter such problems..

As you can see the image is perfectly transferred.

 THIS is the nail polish I used !

There are not much to say about it - it's perfect (as you can see on the stamper). Very opaque - a very important trait from my point of view when we're talking about stamping nail polish- and the drying time is perfect.

Not too fast not too long - you get enough time from the plate, to the stamper and on the nails.

You still have to move fast but that's what stamping is all about.

Look how well the nail polish fills up the design on the plate - no empty spaces.
The plate I used I received from Kinga  as a Secret Santa gift!


Back to the stamper now !

The "hype" as I said in the title...is due to the fact that you can see trough the other end while you stamp.
Thanks to this new "invention" we can finally see where and how we stamp! Kudos to that.

In the photo above you can see the image i want to stamp from the other end of the stamper.


And...the final photo I want to show to you is this one. As you can see the design transferred perfectly - good job stamper good job nail polish.

Be aware if you use this nail polish - it stains the skin, not the nail though. You can see on my finger that I have blue stains so be extra careful and use some peel off base if you have. I also ruined the design because I desperately tried to clean the skin for the photos ...but I couldn't.

If we talk about the stamper we need to pay extra care when we clean it. I am used to cleaning my stampers with polish remover - it's a lot easier and faster since I have it there whenever I stamp so I can clean the stamping plate.
From what I've read ...this clear jelly stamper will be compromised if you use polish remover. Instead...you can use scotch tape or a lint roller.

Here's my option for cleaning the stamper :


http://www.bornprettystore.com/


Monday, 18 January 2016

Abstract black and white nails.

Hello hello! 
 

Did you have a good weekend? I took advantage of it to create a manicure using acrylic paints - I haven't done that in a while. 
At first I wanted to do a landscape manicure but I decided to do an abstract design. 

This is not a special manicure but I liked it a lot and I had a great time doing it. My inspiration was found on google : 


When I saw this picture I was sure this was something I wanted to do. 

What do you think? 

I wasn't sure how to do this design and then I remembered I had a new brush from BornPrettyStore and decided to try it out. 


The brush I used is very very thin and long so you can do very precise straight lines if you want to - i did a few curved ones. (as you can see in the pictures) 
It was very easy to make them very very thin - using the acrylic paint also helped a lot since it's a lot easier to paint with them rather than with nail polish. 

 
What I absolutely love about this paint brush is that the handle also acts like a cover, so if you want to take it with you it's easy and the bristle is not damaged. 

Even if my inspiration was all black and white I also decided to add some colour! 

What do you think? which one do you like it better?
I also decided to use my matte top coat from GoldenRose to make it matte. 

What do you use for painting? 
If you want this brush, you can get it HERE at a special price if you use my discount code. 

Saturday, 16 January 2016

January's Nails Challenge - Ice or silver nails

Morning lovelies!

Second Saturday, second challenge....and that's how we'll find ourselves in December 2016, at the end of this challenge - time really flies.

For this week's challenge we had to choose between  ice or silver nails - I decided to go with silver this time.

This manicure was a good occasion for me to use my BornPrettyStore Vinyls.  I absolutely love the way they look and I decided to use them in a different way they are usually used.
Even if the vinyls are fish scale- like , i think they can be used in the winter too.


I have to admit I ruined 3 or 4 stickers before deciding what to do with them.
For this manicure I decided to stick the vinyls on my nails and cut the edges, instead of putting nail polish over and removing the vinyl.
Golden Rose care&strong nr. 171
Flormar 392 Holographic silver


My new top coat from RimmelLondon


The vinyl are absolutely gorgeous- they have an amazing holographic shine and they stick very well to the nail. So if you want to put them one, add nailpolish and then remove them, make sure your base colour is perfectly dried.


If you want to buy these nail vinyls you can find them HERE and you can also usse my discount code.


  1. Mădălina - http://misshappyandhernails.blogspot.ro
  2. Oana - www.unghiutele.blogspot.ro
  3. Iulia Maria - http://iuliafairynails.blogspot.be
  4. Mihaela http://elasdreams.blogspot.ro
  5. Eva - http://whatever-eva-wants.blogspot.ro/
  6. Alina JustAnAngel - http://justanangel.net/ 
  7. Madalina - http://frumusetelapretmic.blogspot.ro
  8. Corinahttp://na-na-nails.blogspot.ro/
  9. Deyutza - http://deyutza87.blogspot.ro/

Thursday, 14 January 2016

Peel off nail latex from BornPrettyStore

Hello hello :)


How are you lovelies today? I have a question for you : do you ever feel like doing an ombre manicure but you're not up to cleaning the mess on your fingers?

I know that the peel off "helper" (how i like to call it) is not a new thing...but have you tried the one from BornPrettyStore? (it's on the site at the special price of 2.99$ )


I've only tried one but wasn't amazingly happy about it ....like I am not with this one either!

I am not going to say it's bad...it's just...not like the ones i've seen in tutorials.

This one , which you can find on the bornprettystore sote in a bottle of 15ml,  is very opaque (which is good cuz you see perfectly where you've put it) but it takes a bit long to dry.
It covers perfectly to be honest - as you can see in the picture.

What I saw while trying to clean up is that the part of the latex where you got polish on ...is a bit softer than the rest...and it breaks a bit...doesn't peel off as I would have wanted it to.


You can see in the picture above what I am talking about : the part where I had more nail polish got stuck on the finger ...but I was able to take it off easily :)


However, as a conclusion ...this is a good-ish peel off "helper". You can see in the next picture that there wasn't much to clean after I took off all liquid tape.


I would probably buy this one if there wouldn't be another option. :)

Don't forget about my discount code  : CUMX31 on the site ;)

Monday, 4 January 2016

AVENIRO- glass files

Good morning darlings and Happy New Year!

I hope you all have a great year and that all (or at least some of) your dreams come true - don't forget to work hard for them though!

I am going to start my 3rd year (YAY!!) of blogging with a review for a product that is very important for the health of my nails : files, but not any files, GLASS FILES.

To be honest, I was in love with glass files when I was younger - they seemed so...fancy at the time. I had no idea about the benefits they have. Even so...after the 4th ( i think) glass file I bought and used a maximum of 3-4 times, I stopped buying them because it was clearly not right to use it a few times and then ...no more abrasive surface! (the fact that a colleague from high school dropped it on the floor and broke it in a lot of pieces may have also had something to do with the fact that I stopped using them)

We should get back to the point here : AVENIRO Glass Files.

Aveniro is a company from the Czech Republic, located in the traditional glass making region near Novy Bor, company specialized in making glass files, crystal nail files.

For the purpose of this review...I received 3 files : one manicure and 2 foot scrappers.


I want to start with the 2 foot scrappers (which are dad&son - because they are the same thing only in different sizes). 

The "big boy" is 16,5cm long and 6mm thick while the baby, 13.5cm, and same thickness. These files have 2 different faces - double roughness. 

One side is coarser and is meant to remove the calloused skin while the other side is a lot smoother ...perfect for making some adjustments. 
(those of you who read my blog know that I have problems with the skin on my hands, never being able to properly get the hydrated - well...the same goes for my soles - of course, I tried the file on my heels and I was impressed with how smooth they were - but I won't show you a picture of that hehe) 

I like the fact that both files come in a pouch, therefor being protected and also making storing them on a shelf in the bathroom a lot easier. 

As you may have guessed, the "son" being smaller is perfect to be dropped in your purse and taken along- you never know when you need it. 


The manicure nail file is bigger, 19.5cm in lenght but smaller in thickness, only 4mm. 


When it comes to manicure files...their variety is a lot bigger : all kind of shapes and sizes and also different rougness. You can read a lot more HERE- on their official site.

The size I got is perfect for filling nails down. Those of you who don't clip their nails...you know how frustrating using a bad file can be when you want to shorten your nails, right? 
Ah well darlings....goodbye long hours of filling down- i have to admit that I was...shocked on how well the file worked. 

3 moves and bam -> instantly shortened nail. You have to be careful with this (as so do I) until you get the hang of it because you might end up filling down too much of your nail and we certainly do not want that. 


As I said, at the shape and size this file has this is its best purpose - you cannot use it for shaping your nail due to its thickness - but that's not a problem, look at how many choices you've got: 


What is special about these nail files ? 

1. They have a unique surface - a micro structure created by special chemical etching that helps the 
surface be filled with regularly arranged grinding spikes.

You can read here more about their production techniques and also see a comparison between the normal files and their files.

2. Long term use - unlimited lifespan of the abrasive surface

3. Easy to wash- simply wash it in the sink. Water and some detergent (hand soap for example) and the file is perfect! 

For more perks of using these nail files visit the official site of AVENIRO . 


I absolutely loved the files...and I have to admit the fact that I would love to have all of them : big and small :D

Now...the last thing I want to mention is their large variety of decoration they offer. You can even customize the way you want it - make your perfect glass file. 
Visit their facebook page for more info Aveniro-Facebook


Wednesday, 16 December 2015

Sarbatori aurite #2 - alaturi de Golden Rose

Buna dimineata dragilor!

Cum va simtiti in apropierea Craciunului ? Fiind sarbatoarea mea preferata eu sunt foarte incantata si abia astept sa NINGA!
Anul acesta Craciunul o sa fie putin diferit fata de pana acum : departe de parintii mei dar va fi primul alaturi de iubitul meu! We lose some we win some!

Lasand toate astea la o parte...a venit vremea pentru o manichiura noua , si de aceasta data tot aurie si tot in colaborare cu cei de la Golden Rose.
V-am arata in ultima postare o manichiura simpla cu cateva studs...astazi, o sa va dau o idee pentru o manichiura de "sarbatoare" realizata cu o oja texturata.

Ideea cu care am pornit manichiura a fost : zapada! (drept dovada ca eu chiar imi doresc sa ninga- am crescut la munte si nu concep ca de Craciun sa nu am zapada)

M-am gandit sa "pun' pe unghii niste fulgi care se aduna in nameti pana acopera unghia de tot. Ei bine...nu stiu cat de bine mi-a iesit dar imi place cum arata.

Sper sa va placa si voua.

Goldden Rose Color Expert nr. 110 si Golden Rose Holiday nr.82
Culoarea de baza, desi pare a fi negru, este un albastru foarte farte inchis! Este o culoare superba cu un luciu minunat si cu o acoperire perfecta din doua straturi! Iar in caz ca va intrebati, nu, nu pateaza unghia!
Si de aceasta data, ca de fiecare data am fost foarte multumita de oja texturata : se intinde bine, acopera bine dintr-un singur strat si se curata foarte usor! Perfecta pentru aceasta perioada a anului.


Daca nu ati vazut inca, am anuntat castigatoarea concursului! (felicitari norocoasei)

In curand o sa va arat o manichiura realizata tot in colaborare cu Golden Rose, manichiura sclipicioasa, tot cu fulgi !

Va pup